Students Instructions for Using Microsoft Teams
1. Go to Classlink and log in with your Username and Password (the same ones you use to login to the computers at school).
A note about usernames:
If you are using a district device, your username is your 10-digit student 57 number (Example: 5712345678).
If you are using your own device, your username is your student email address, which is your 57 number + @students.santarosa.k12.fl.us (Example: [email protected] ).
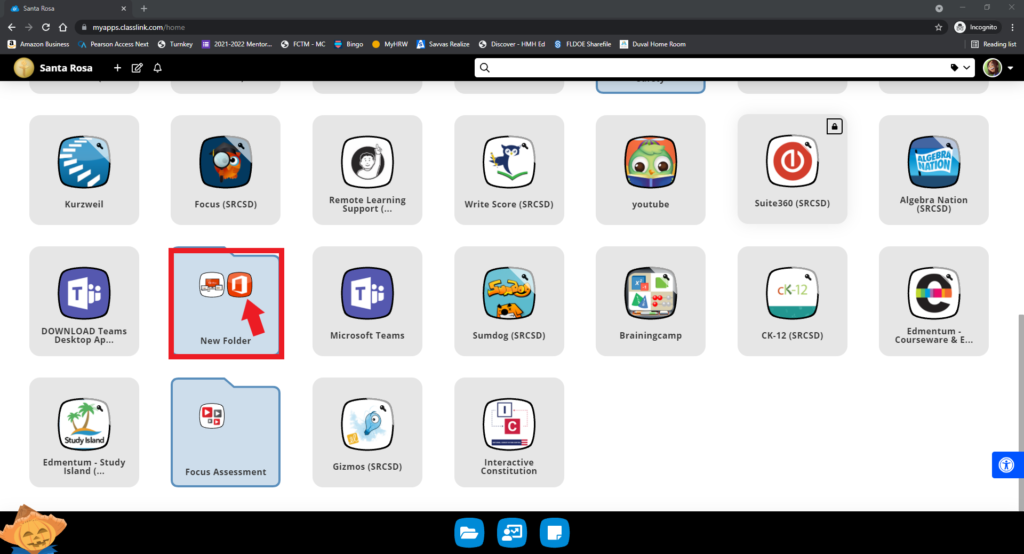
2. Once you’re logged in to Classlink, you will want to click on the Office 365 tile to log into Microsoft Office 365. Notice that this app may be inside a folder depending on how students organize their Classlink apps.
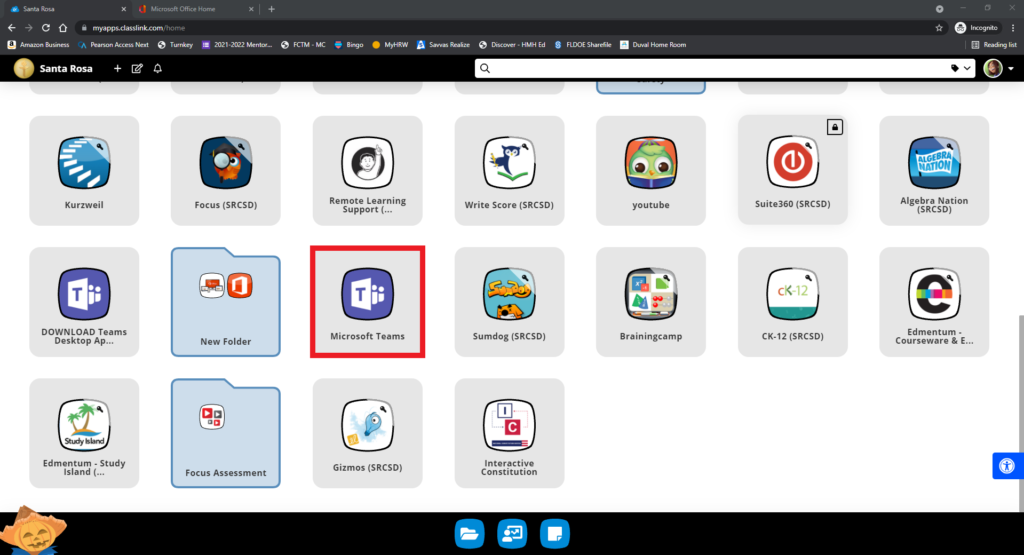
3. Once you are logged into Microsoft Office 365, go back to the Classlink tab. Now you will want to click on the Microsoft Teams icon.
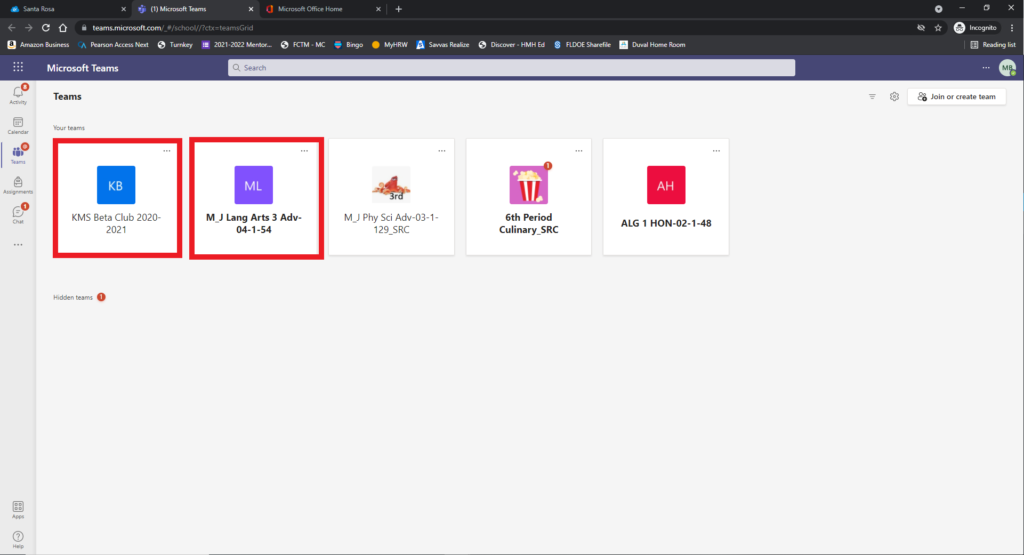
4. This is going to open up to the Teams that have been set up for each of your classes. (The names might appear in two different ways.)
- A name your teacher gave the Team.
- Or, the way the class is listed in Focus.
To open up to the class, simply click on it.
5. Once in the class, this is what you will see. Each class will open up to “General Posts”. This is where you will see new assignments and announcements from your teacher.
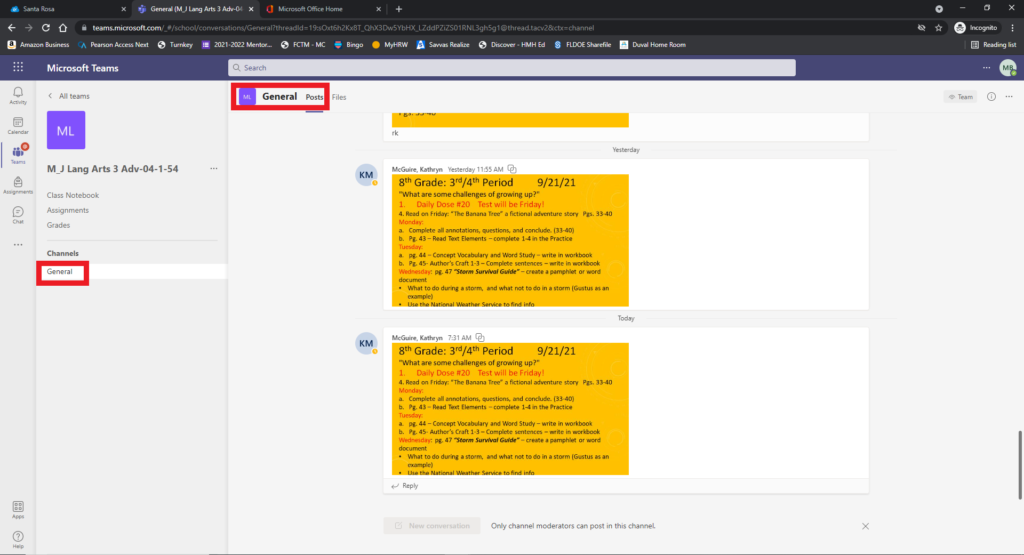
6. Along the top and on the left side of your Team page, you will see additional tabs. Your teacher may add more tabs, so be sure to pay attention to these areas.
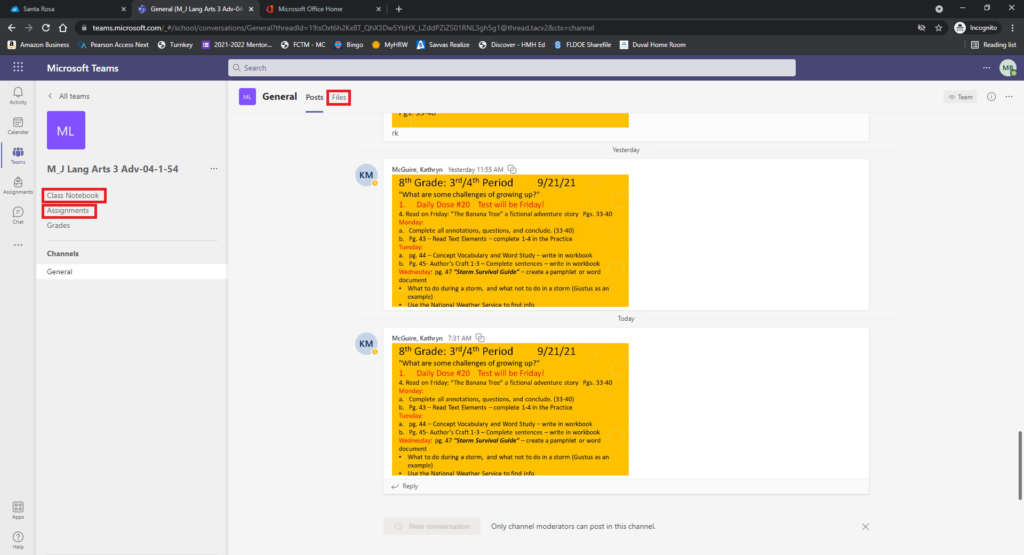
- The Files tab is where your teacher may upload important class documents. These documents will be read-only, but you can open and download a copy if you need to.
- The Class Notebook will open up to your class OneNote. (If your teacher chooses to use this for notes or assignments, they will give specific directions regarding that.)
- The Assignments tab is where you will be able to see any assignments that have been assigned to you. (We are going to explore the assignments feature a little more in the next section.)
7. If your teacher uses the assignment feature and you click on “Assignments” this is what you will see.
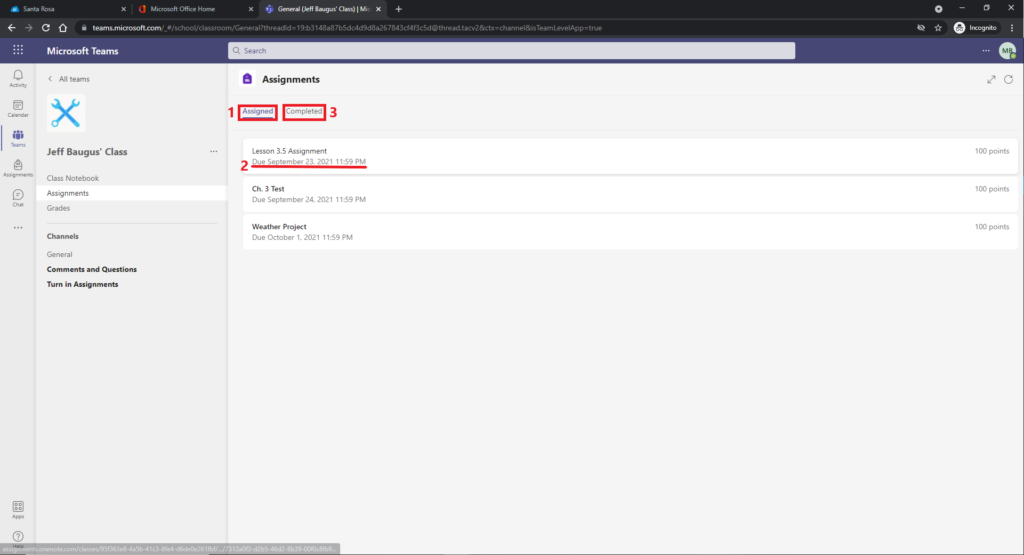
- What has been assigned.
- When the assignment is due.
- What you have already completed.
It will be really important for you to pay attention to due dates so you do not fall behind. If your teacher does not use Assignments, you will see a message saying you do not have assignments yet.
8. When you open an assignment, this is what you will see.
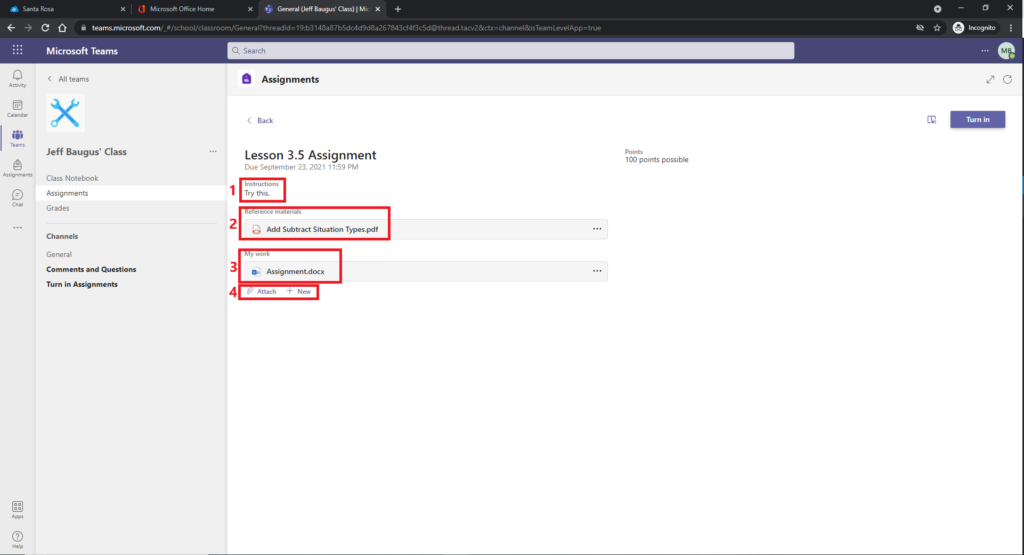
- If the teacher has provided specific instructions, they will show here.
- If the teacher provides a document for you to view for the assignment, you will see it here.
- If there are any documents you need to edit or complete for the assignment, they will be here. Click to open and edit them.
- Click the link for “Attach” to upload a file from your computer. Click the link for “New” to open a new Word, Excel, or PowerPoint file you can edit and turn in for the assignment.
Your teacher will be able to view and check your progress on an assignment even if you do not turn it in, so if you are stuck or you are not sure if you are doing something correctly, you can ask them to take a look and provide help.
IMPORTANT: In order for your teacher to know that you are completed with an assignment, you must push the purple TURN IN button in the top right of the assignment screen.
Extra tips and tricks:
- Download the Teams app on your phone and have access to all your classes there. This will also allow you to get notifications when you have a new assignment available.
- Remember, your district email address is your 57 number followed by @students.santarosa.k12.fl.us (Ex. [email protected])
- Stay on top of your assignments and due dates by checking in daily.
- Remember to get in contact with your teacher via posting a question in Teams if you have any questions or problems.
